Remove Background from a picture
Hello Designers, I am posting after a very long break but it is a necessity to take a break to design and increase scope of designing for a designer. So, today I bring you a basic method of removing the background from a picture which is very complicated work actually but after a long time work you will get definitely what you want.
1. First decide picture(Normally with single color background for start up):
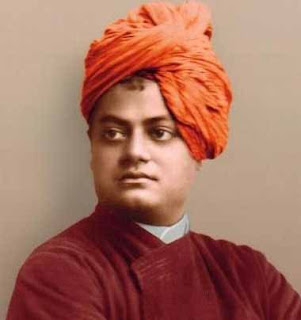
Here is the picture of Vivekananda I have taken for this purpose:

note: You can use this image for reference.
2. Now start work on Photoshop 7.0 or above:
Next, you need to create new workspace by pressing CTRL+N or by using Menu bar>File>New.
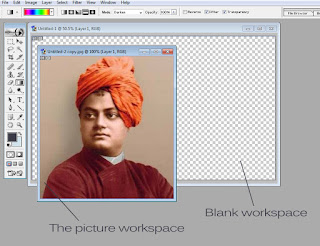
Make sure you will have blank workspace, then copy and paste your picture above or go to Menu Bar>File>Open>Browse your picture
It will appear like this::

3. Select Lasso tool:

Need to right click on the tool menu to select Lasso tool if it is not already selected tool. Now next step will be selecting the area of interest only that means Vivekananda's picture only same like as I have done:

3. Copy the selected item on other workspace
Here you will require another blank workspace, just add it and paste this on that workspace just like I have done::

Here you can also just drag and drop on the other workspace like me.
next go to the tool menu and select Magic Wand Tool:

4. Now erase extra matter on picture:
Here, it is somehow haptic task to eliminate those extra matter, but don't worry you can do it anyhow with me.

Now delete this area using delete button on your keyboard and similarly select others with the help of magic wand tool but there may be some instance where you need to manually erase things by using Eraser Tool as shown below:

In such scenario you need to use eraser tool, and use this tool with caution because it may erase your crucial part of picture but thank Photoshop that we have ctrl+z facility. So try it because you may not succeed in the first time.

Note: reduce the size of eraser from the properties menu above the Tool Box. Your picture will look like as below picture:

In order to hide some cutting edges you can use blending options that I have applied to it.

Now you are ready with your image and just add a background to it that you have previously created by using my previous tutorials Design Background
5. Finalize:
Now this is the final step of this tutorial, you need to use now the blank workspace with size 1366*800 approximately and drag and drop the pic to the blank workspace. I have added a simple background with some quotes
You need to select the background layer then

If you want to enhance more then you can use Brush tool on the border of Vivekananda's picture. It will definitely enhance the quality.

Here, I leave my tutorial with you to place another tutorial to show you more but this time I will use a programming language.
Happy Designing.


No comments:
Post a Comment