In this tutorial we
will learn to create the clouds in photoshop. This is very easy task and
nothing more complicated just inbuilt tools and some creativity and you are
done with it. Let's start it then:
Step 1:
Requirements:
- Adobe photoshop
- Your focus
Step 2: Getting
started
Create new photoshop
workspace and fill it with light colors I have done it with creamy color with
light orange color:
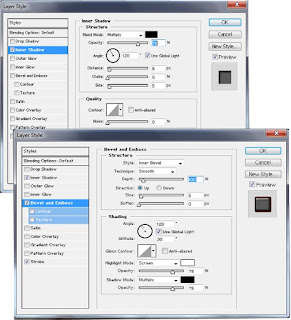
Step 3: Effects
Step 4: Add a new layer and create a rectangle with the Rectangle Tool. Make it slightly smaller than the background, so it will have some borders. After that apply a Gradient Overlay via Layer Styles.
Step 5:
For the Clouds I created a brush. It's really easy and I learned that from another tutorial I found online, But I decided to show you the screenshots too, because it's easier to follow. Basically create a brush and use this settings:
Step 5:
For the Clouds I created a brush. It's really easy and I learned that from another tutorial I found online, But I decided to show you the screenshots too, because it's easier to follow. Basically create a brush and use this settings:
- Brush Tip Shape: Round shape, 500px Diameter, 0% Hardness, 25% Spacing.
- Shape Dynamics: 100% Size Jitter, 20% Minimum Diameter, Angle Jitter 20%, Roundness Jitter 0%.
- Scattering: Scatter Both Axes and 120%, Count 5, Count Jitter 100%.
- Texture: Select Clouds for the Pattern, 400% for the Scale (but you can make it bigger if you want the couds softer and you will have to reduce the size if you want a smaller brush). Mode Color Burn
Remember: you need to choose any of the Brush tool first before applying brushing effects from toolbox.
Step 6:
Now add a new layer and select white for the color. Choose the Cloud
brush and start painting the cloud. The secret here is painting it very
slowly, click by click until you get the shape you want.
Step 7:
The previous step we created the first part of the cloud, but to make
it look more realistic you will have to create some dark
areas. Add another layer on top of the white cloud and go to Layer>Create Clipping Mask. Select black for the color and change the Brush Opacity to 50% .
Then start painting the dark areas. If you look at some real clouds you
will notice that these dark areas are always at the bottom of the
clouds, so do the same.
You can add some effects as I have done:
Step 8:
Create another cloud and place it on the other side. And place left or right and done. Just play sometime with it and you will hit it somewhere. Now Add a Circle filled with white into same workspace and this seems to be as below:
Step 9:
Now in the next stage you just need to do some effects as follows if you want:
Step 10:Finally if you want you can add some thoughts of yours into it as I have done:
Here is my jpeg format image:
Happy designing.


